Showing posts with label summer. Show all posts

Thursday, August 1, 2013

Morning Mess!

I got up somewhat early to get my son ready to go hiking up Camel's Hump with his dad this morning.  I have been trying to be a better housekeeper so as soon as I come downstairs I clean the kitchen, take care of the dishes, and sweep and vacuum the floor (its white, because someone thought it would be fun to put white vinyl down in a g-d kitchen) and then have my coffee and eat breakfast.

I got the kitchen all pretty except for the Eternally Cluttered Counter which seems to breed crap when I'm not looking, and went up stairs to make my bed and get dressed.  The girls had gone downstairs and Alex had left for the day.  I sat down to continue cleaning out my computer (the kind of housework I probably shouldn't be doing) since it has been running slow lately, when I hear "OH NO!" and "OOPS!" in a midget voice.

I gently laid my forehead down on my keyboard wrist cushion and closed my eyes.

"MOM there's a HUGE MESS of cereal down here!!!  Autumn spilled Kix everywhere!!!"

All I could picture was a sopping milky mess of soggy nasty sticky yellow balls and me going through a million paper towels and having to mop and fight the cats to get the milk cleaned up.  Did I mention that I ran out of both coffee k-cups AND creamer so I hadn't had my go-go juice?

I sighed and got up, walked downstairs, and to my slight relief saw this:


Thank you, God, that it was DRY CEREAL and not the nightmare I had imagined.  

"Autumn, what the heck happened?" I said.

"I was trying to get these CRACKERS when the cereal went upside DOWN and all OVER the place!"   

"But you need to have breakfast not crackers!  Those are a snack!" I said. 

"Oh."

Alicia jumped up and said "I'll vacuum!  Mom, you go relax, you deserve to be lazy today."  Aww.  How sweet.  Except that our vacuum can only hold about 1-2 cups of Kix so I had to supervise and empty the canister a couple of times.  Those Kix really take up a lot of space.

Autumn helped too with her little broom and dustpan :)

It's full!

Afterwards I went to make my coffee, emptying out a previously used K-cup and putting in some Starbucks Vanilla coffee from a bag, dumping half the old grounds on the floor when trying to tap it out into the trash and causing me to curse a few times.  I finally got it taken care of and went to the Dollar General to buy a box of those nasty little (no refrigeration necessary) International Delight creamer cups, a box of nail glue, and a box of fake nails.

Alicia has a new obsession with fake fingernails since she cannot stop biting her real ones.  Yesterday I tried to put some fake ones on her with Krazy glue before reading that its a horrible idea and therefore within 10 minutes I soaked her hands in nail polish remover and took them off again.  She was after me this morning at 7:30 to get her some real nail glue.


Unfortunately the problem with putting fake nails on a 9 year old is that she won't stay still long enough to let them dry and set properly so she kept coming back to me with different ones that fell off from switching gears on her bike, opening the front door, etc.  Eventually they all came off and I told her we can try again maybe tonight so they can set while she's asleep LOL

Saturday, July 20, 2013

Beetle Betsy

Normally I look forward to the summer months as I am an avid insect watcher/lover/photographer.  But this summer, which has been incredibly rainy and then was incredibly hot, seems to have been favorable for a particular species of beetle called an Oriental Beetle.  Not to be confused with the Japanese Beetle, this insect does not seem to harm foliage at all in its adult stage, but the larvae (white grubs) that it produces will chew the crap out of the roots of your grass, garden vegetables and ornamental flowers.

Japanese Beetle

Oriental Beetle

This is the first year that I have my own small garden outside my house.  I tried one last year at my parents' house but it is a 20 minute drive there and over 100 ft from the water source so it was difficult to properly tend to it.  Plus they don't have beetles there so much as they have horrible head buzzers, horse flies, deer flies, mosquitoes...not much fun.  I don't have those at my house.  My husband built me a beautiful raised bed and I planted some stuff in it.


I'm not quite sure what as I didn't pay much attention, but I'm fairly sure it is mostly cucumbers, parsley, a tomato plant, and cosmos.  As an added bonus I have a buttload of sunflowers growing in the back that the birds planted.

I first noticed that there was an excessive amount of beetles a few weeks ago.  I would walk outside and get attacked by them.  They do not bite or sting but will clumsily fly around your head and land in your hair or on your clothes and with their pokey little feet they are hard to get off.  If they land on your skin you will feel it but it does not hurt.  However it scares the crap out of my girls when one lands on them.  I decided to git-r-done.

I first went to Aubuchon.  They only had Japanese beetle traps, but I was desperate so I bought one in hopes it would trap both kinds.  I set it up and watched as Japanese beetles came from no where and fell in.

Japanese beetle trap

Japanese beetle on my flowers, right downwind of the trap and not seeming to care...after 2 rain storms it seems to have lost some of its potency.

  I previously had not seen any of those so it obviously is a strong attractant!  None of the Oriental beetles seemed to be able to make it into the bag though.

Next I tried Ace, then Lowe's, then Home Depot.  No one had anything for these Oriental beetles.  I called up the local agricultural store, L.D. Oliver Seed Company, and they had had them but were sold out and weren't going to get more until Friday.  It was Wednesday and I was really wanting to get these buggers gone before they decided to lay eggs all over the yard.  I bought a bottle of Bayer Grub Control and sprayed that on my garden dirt and on the lawn around it.

Friday came and I went to the Oliver Seed Company.  I was happy to see that they did indeed have the traps for this kind of beetle and happily paid my $9.95 for one.  The boy behind the counter said this was the first year they had carried these traps and they were selling fast.  I took it home and assembled it in the car.  I opened the door to the car and got the pheremone disk out, opened the bag, and put it on the trap structure.

Here is a short, crappy video I took:


BZZZZZT  BZZZZT BZZZZZZZZZZT

That was the sound I heard in my ears.  I looked around and these beetles were coming from every corner of my lawn and swarming around me and the bag.  As I held it beetles were falling into it.  I hadn't even put it on the hanger yet.  I set it down on the ground and tried to assemble the metal hanger (sold separately for $4.95) but the damn metal sleeves that hold the metal rods were too tight.  Cheap thing.  So I had to take it inside and shove a screwdriver into them and wrench them apart and then hammer the rods into the sleeves.  I came back out to a black cloud of beetles around the pheremone.  I picked it up, beetles clinging to my arms and hair and clothes, and pushed it all into the ground.  Instantly there was an inch deep of beetles inside the bag.

Assembled, and already attracting.  The round thing at the top is the pheremone.
  
In 1 minute this is how many there were inside...

I ran back to my car and drove to my parents' house where I was going to spend some of the 100°F afternoon in their air conditioning.  A wind was picking up which was blowing hot air around and it was miserably humid.  About 5 minutes down the road my A/C in my car quit on me.  It made a nasty burning plastic smell and then the compressor stopped working.  Dammit.  I shut it off and rolled down the windows.  My poor Autumn was in the back crying for alternate reasons. First she was too hot, then the wind was blowing her hair into her eyes and mouth and she wanted the windows up, then she was too hot again.  Poor thing eventually went to sleep.

When I left my parents' house 2 hours later and made it back home I was dismayed to see the beetle trap had fallen over in the wind.  The cheesy metal stand had come apart and there was a mass of horned up beetles writhing in one spot.

Spilled Beetles

 I had a horrible thought that perhaps I had just turned these beetles on and they would escape, fertilized and ready to lay eggs, making the matters worse than if I had left them alone in the first place.  I began plucking beetles from the ground and plopping them back in the trap.  But there were so many it would have taken me hours and it was so very hot outside.

That was yesterday.  It rained very hard last night and was insanely windy but the beetle trap stood up to it all and was still standing today.  I went out to check out how much was in there (at this point its actually FUN for me to be doing this.  I need a job.) and as I approached the bag I could hear scritch scratch scritch scratch sounds.  There was a good 2" or more deep pile of beetles in there.  Wow.


And the ground was still moving with more crawling in that direction.  I saw one actually fly and make it out of the bag so I realized that I should probably dump them out so that the pile can start over.  I got a gallon size ZipLoc bag.  The bottom of this trap has a handy zipper lock also so that you can dump it out and reuse it, unlike the Japanese beetle trap pictured earlier in this long post which you have to buy replacement bags.  I placed the open ziploc bag over the bottom of the trap and managed to unzip the trap enough for the beetles to start spilling out.  Yuck.  This is how many I got:

Most of what was in the bag

They are mostly still alive too.  Hopefully not for long.  I zipped the trap bag back up and set it straight again.  Then it rained really hard.  The sun came back out and when I checked on the trap (an hourly process for me at this point:  checking and plucking and tossing in more) there were several beetles flying around it again, more in the bottom, and more crawling up the grass trying to get in.  

I'm both interested to see how many more I catch by the end of the day, and horrified that there are so many of these pests in my yard!  I think I will go buy 2 or 3 more traps and set them around the perimeter of our condo property.  Then I get to check on and empty even more bags!  LOL!  Check out that Oliver Seed Co. if you are in Milton.  I had never been in there before but they seem to have good prices and all sorts of stuff for farming and gardening and they are always having a sale on something!


Saturday, September 1, 2012

Metamorphosis: Complete

My last post was about finding and raising Monarch caterpillars.  This one will be about what happens once that 10 day waiting period is over.  Magical does not even begin to describe this process.  You can break this process down as scientifically as you want and I will still be in awe and amazed at the complex design of this creature who's only purpose seems to be mystifying everyone who sees it.  That's how I feel about all butterflies and many moths.

Anyway, I will pull my head out of the clouds of wonder for a few moments and describe to you what I saw!

When I woke up on Friday morning and came downstairs to make my Maypo I noticed that the two chrysalis that had formed first were both black!  This happened to me with the first butterfly I hatched this summer (before I stumbled on the huge bounty of caterpillars I've now got) and I waited up into the night waiting for it to hatch.

Taken August 11, 2012 

Of course it waited until I went to sleep to come out!!


There was a little something different about these chrysalis.  They were black as midnight.

Chrysalis #1 Taken August 31, 2012

Chrysalis #2 Taken August 31, 2012

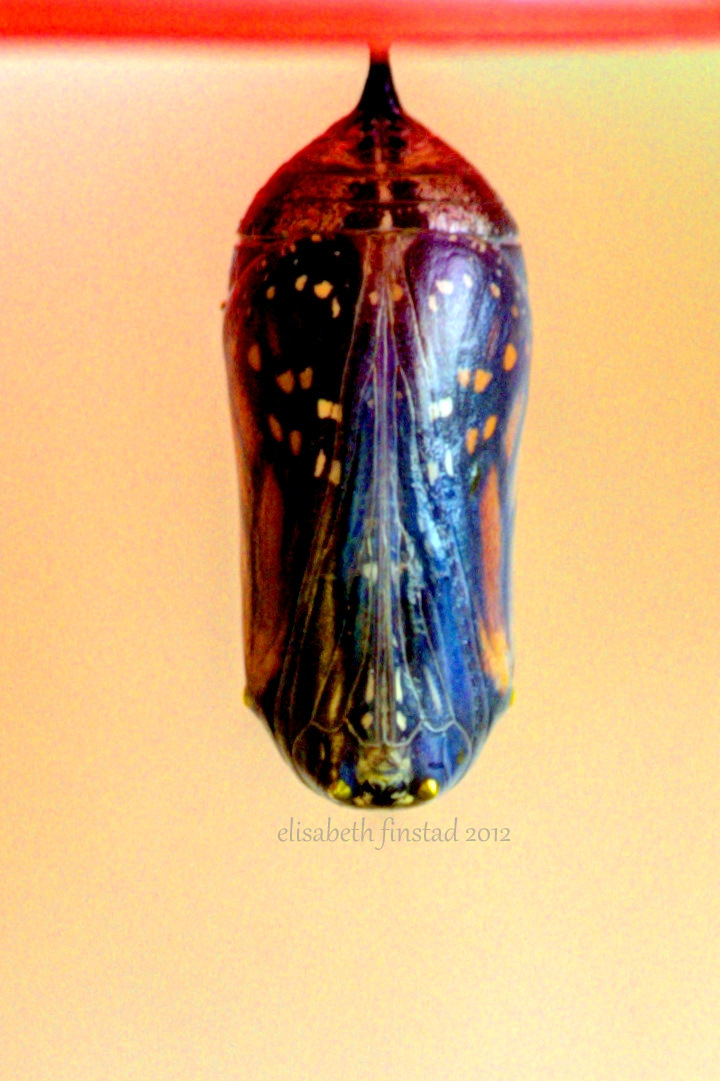
You can see the difference!  Another bit of useful info that one of my Facebook friends gave me is that you will see a bit of liquid inside the chrysalis at the bottom moments before they emerge.  This is meconium, or "frass" (butterfly poop) which is also the term for when a human baby has it's first bowel movement inside the womb!  Monarchs are born head down and the large part at the top of the chrysalis contains it's abdomen, all of which is squished up in like an accordian.  You can see in the photos that the wings are tightly packed to the sides.  Look at how a fresh chrysalis looks like a mold for the butterfly wings:

This chrysalis has not yet compressed and hardened, and you can see the wing detail and even the form of what the abdomen looks like (ringed part at the top)!  The yellow dots will become that beautiful metallic gold that is made possible by a chemical compound found in milkweed poison!  

This chrysalis is a few hours older than the above one, and is how it will look until it turns black.  You can still see the wing pattern!  There is an iridescent quality to the entire chrysalis that is hard to photograph, and you may not even notice unless you hold one in the light and look at it.  


Unfortunately one of the chrysalis fell off it's cover because I opened the tupperware it was in and didn't realize it had threaded too close to the side. 


 These need to be hanging properly or they won't form correctly.  I had read that you can take a bit of thread and white glue (no superglue!) and rehang them, so I thought I would give it a try.


The black "stick" at the top is the cremaster.  I put a small dot of white glue on it and then carefully laid it down on the counter and wrapped a piece of white thread around where the glue was and double knotted it:


At first I didn't know what to hang it from so I wrapped the thread around the knob of one of my cupboards!  High traffic area though so I had to figure something out...

I went to the local Hannaford grocery store and bought a $5 chrysanthemum!  I needed something for the butterflies to chill on when they were done drying and it fit inside the Butterfly Pavilion nicely!  I ended up pulling and rehanging 4 chrysalis on this mum just like Christmas ornaments!  I will be doing more tomorrow because the tupperwares they are in are too shallow to effectively allow the butterfly to dry. 

Now, on to the emergence.  As I had been able to do time-lapse movies for both molting and pupating I had hoped to get one of the last stage as well.  I watched that second chrysalis like a hawk.  I set my camera up with the 18-55mm kit lens I love so much and checked on it every few minutes.  

As you can see I have suspended the chrysalis between two drinking glasses in order to allow enough room for it to hang.  When I had come home to find the first butterfly out it was laying on the bottom of the tupperware flailing it's legs because it had not had enough room to expand and fell. 

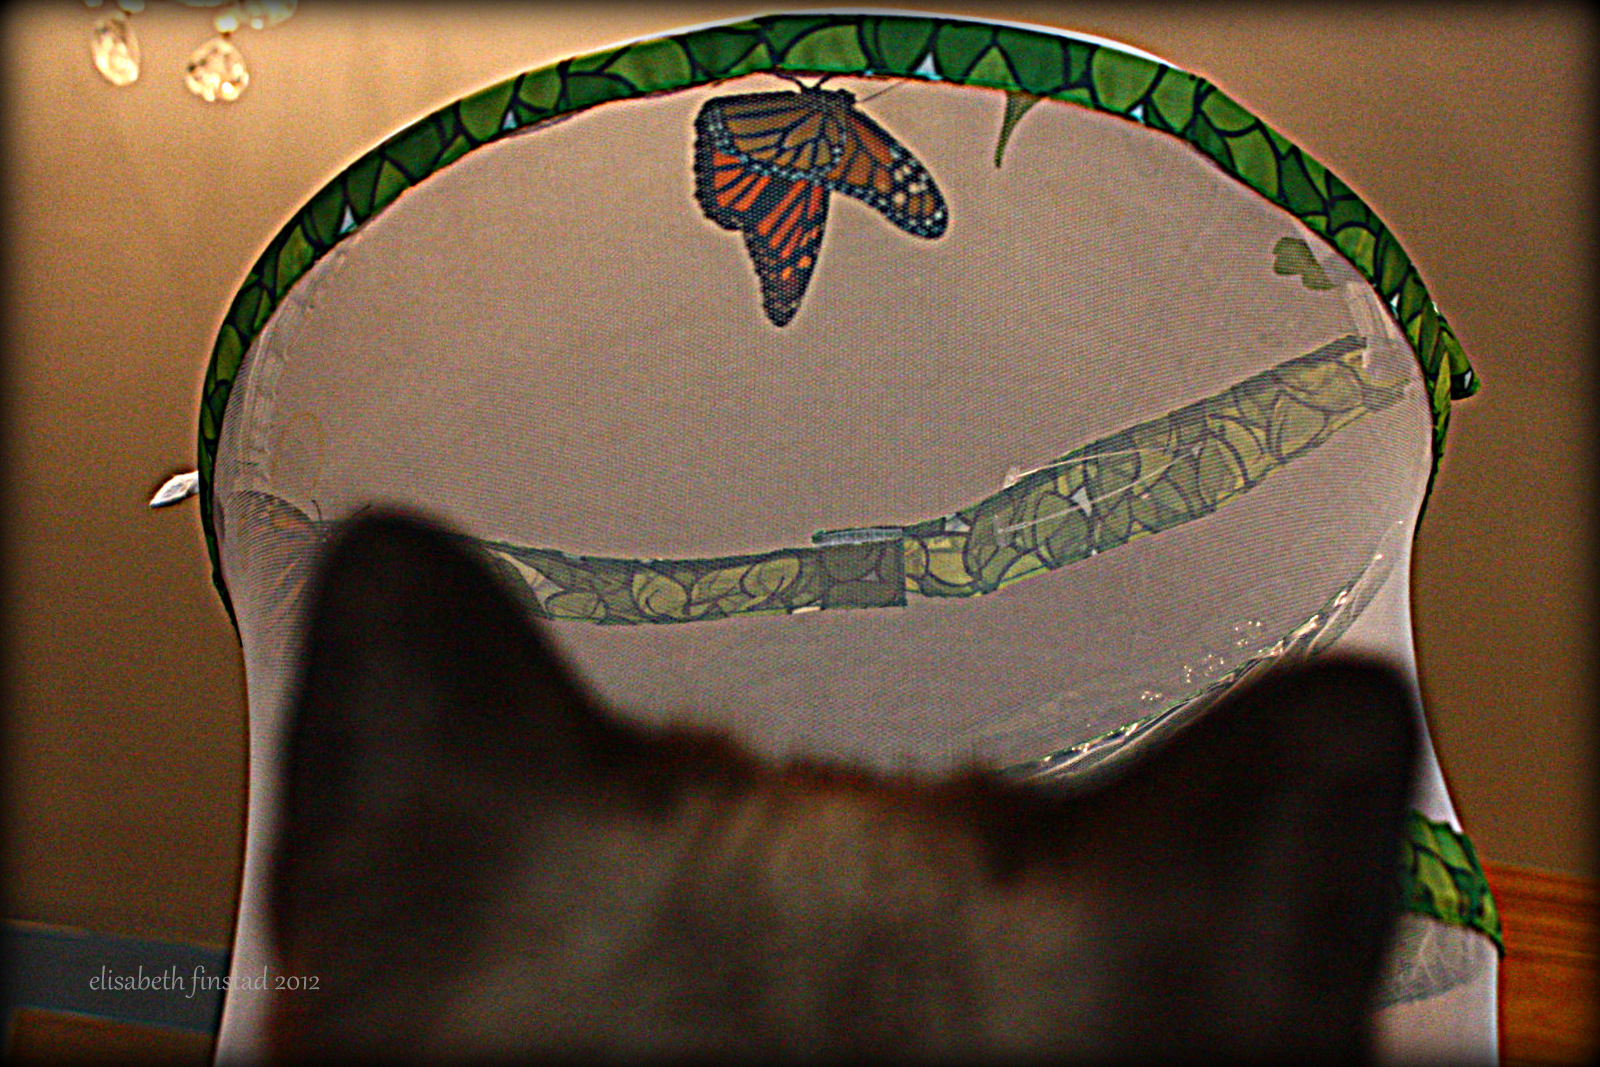
Can you spot the butterfly?  I had to hang it on the geranium until I could find a better spot for it to dry!


Much better!

Here is the 18 seconds of amazement that 136 photos over 20 minutes compressed down to:


I keep watching it over and over!!

A still shot


Our Siamese, Shadow, is very interested in the new fluttering object in our dining room!

Next post:  Black Swallowtail caterpillar/chrysalis attempt!

Thursday, August 30, 2012

Raising Monarch Butterflies Because I Didn't Have Enough To Do Already

If you are thinking about raising a Monarch caterpillar, please read this entire posting as I have tried to include everything that I learned, both good and bad, and some preparatory info that will raise your chances for success.


FINDING MONARCH EGGS AND CATERPILLARS:

This summer I had determined that I was going to find a Monarch caterpillar.  It had been a while since I had spotted one and I wanted to do it right this time.  One of my friends had raised from eggs and released 12 Monarchs which she documented on Facebook, and I decided that if I wanted to do this I needed to really put some effort into it this year.  So I did as much research as I could about what eggs looked like, how to find them, etc.  Last year I brought home leaves that I thought had eggs on them, but they turned out to only be little hardened drops of milkweed milk!  Upon actually looking it up I discovered that eggs are not round, they are kind of football shaped with a point at the top.

Underside of a leaf

Under a microscope

This one was on the top of the leaf

As soon as I realized this was what they looked like I started finding them all over the place!  The butterfly lays 1 egg per leaf, usually on the bottom.

Egg Hunting Tip:  Look on the shorter, fresher milkweed growth for eggs.  The huge plants usually do not have eggs on them.  I think this is because the baby needs tender leaves to munch on when they are first hatched.


Baby caterpillar fresh out of the egg!

Baby caterpillars look much different than the big stripey ones we are used to seeing.  They barely have any "horns" and are very light colored.  Be careful when turning over leaves that you don't squish one by accident or knock one off!

This one is about 3 or 4 days old, and has only molted once.

Facts about the Monarch caterpillar life cycle (most info from http://www.Monarch-Butterfly.com):

  • It takes about 4 days for the eggs to hatch once laid.
  • It takes about 2 weeks for the caterpillar to fully become and adult.
  • It takes about 10 days for the caterpillar to become a butterfly inside the chrysalis.  10 days to become something completely different than it was when it came out of the egg.
  • Adult butterflies of the first three generations born during the summer in the Northeast live 2-6 weeks. The fourth generation is the one that will migrate all the way to Mexico for the winter.
  • The Monarchs that are overwintering in Mexico will live 6-8 months!  They kind of "shut down" as they hang from the trees down there in order to conserve their energy before flying back north.
  • Only 1 in 10 caterpillars will make it from egg to adult in the wild.
  • Caterpillars go through 5 growth stages, or what are called "instars".  Their skin does not grow with them, but they molt, or shed their skin, and then eat it as it contains vital nutrients. 
Time lapse video I made of a caterpillar molting into what I think is the 3rd instar.

4th instar caterpillar eating it's molt


WHAT CAN GO WRONG AND WHAT YOU WILL NEED TO DO ABOUT IT:

One thing you may not think about is what can go wrong when raising caterpillars that you found in the wild.  I know when we were kids if we found a caterpillar we didn't even think twice about diseases, parasites, etc.
I found one caterpillar that had odd brown splotches on it's back.  They were kind of oily looking and I thought the caterpillar was just dirty.  But because he looked a little odd I thankfully kept him separated from the others.  However, I did have him in the same container as some of the milkweed I had collected, and if I could go back I would not have done that.


This caterpillar most likely has/had OE, which stands for Ophryocystis elektroscirrha.   This is a protozoan parasite that spreads by spore.  Microscopic spore.  It causes the caterpillar to become mottled looking and can end up in either a dead caterpillar, a deformed butterfly, or a butterfly that can fly but will be smaller and weaker and will spread the spores as it flies around.  Bad.

Let me explain about another parasite that can afflict these creatures before I tell you what to do if you find this occurring.  There is a parasitic fly called the Tachinid Fly that will lay it's eggs behind the caterpillar's head by injecting them right through the skin.  It then flies off and the caterpillar goes on munching away.  Depending on what stage the caterpillar was at when infected it will either die and the larvae will come out of the caterpillar itself, or it will pupate and the larvae will drill their way out of the chrysalis and rappel their way down on long white threads.  You can easily tell if a chrysalis is infected, but there is almost no way to tell if the caterpillar is unless it dies.  Here is an infected chrysalis that I had:


There are drops of rain on the chrysalis in these photos.  This was the second infected chrysalis I had.  The other had the strings on it but it freaked me out so I threw it away before taking a photo!

Here is what to do if you have either of these problems occur: 

You will need to destroy the insect/chrysalis.  I know this is hard, and I have trouble killing ANYTHING especially something that I love and raised.  I chose the method of putting it into a zip lock back and putting it in the freezer.  I had to wrap the bag in paper towel so I wouldn't have to look at the dead stuff after.  Leave it in the freezer for a night or two and then make sure it is still sealed and throw it in the trash.  DO NOT PUT THEM BACK OUTSIDE!!!  Do not put a diseased caterpillar, chrysalis, or butterfly back out where the parasite can infect others!  Stop the spread before it starts!

Prevention is also the best method to keep this stuff from spreading and to raise healthy adults.  I want to share what I did wrong in the beginning and then what I realized I needed to do and will religiously do next summer.

Here is the wrong way to store a ton of caterpillars that you found all over the place:

Look at that jumbled mess!!  

Here is the correct way to store a ton of caterpillars:


Each caterpillar has his/her own tupperware container with airholes at the top.  I bought the red topped ones at the Dollar General for about .50 each.  Remember to poke the air holes from the underside so that there are no sharp edges if the caterpillar crawls up to the top, which they often do to molt.  Jim Hedbor, a butterfly/moth enthusiast that I have known since I was a kid, suggested that I put a piece of paper towel in the bottom of each container to keep it more sanitary and make it easier to clean.  I bought the paper towels that come in those "choose your size" packs and cut each one in half, which was the perfect size for the containers.  I emptied and cleaned each container three times a day since I am at home for the most part and I'm a little neurotic.  I don't like to let them sit in their own filth for very long.  If you are gone most of the day I suggest putting 5-6 milkweed leaves in the container so that the poop will fall to the ground and they won't be trying to eat around it. 

FINDING AND STORING MILK WEED

You are probably looking at those containers in the above photo and thinking, wow that must be a huge pain in the tuckus to go out and collect that milkweed!  Especially if they have to be fed three times a day!  Yes, yes it is.  A couple of people on Facebook mentioned I can store it in the fridge with a zip lock baggie.  I never thought of that!

I also try to select only nice green leaves with minimal aphid damage.  Also I try to get leaves of all different sizes in order to not waste a big leaf on a baby caterpillar, and vice versa.  If there are just a few aphids on the leaves then it is salvagable, but if you can find leaves that are nice and clean then there is less work to be done.

Ladybug eating aphids on the underside of a milkweed leaf.  Do not collect leaves that look like this!

CATERPILLAR FEEDING TIP:  Try to collect entire small plants for the babies.  If you find milkweeds that are 8 inches or shorter and are in good shape grasp them from the bottom near the dirt and pull straight up.  Have a glass of water ready to put them in immediately because milkweed wilts extremely fast.  

Once I have picked a large amount of good leaves (don't bother with the dried out yellowish-brown leaves) I bring them inside and wash them in cold water just like I would for a salad, and then dry them on paper towels.  Make sure you remove any insects that are on the leaves as some of them may hurt your caterpillars.  Once dried off I put them all inside a large freezer bag and into the fridge they go!  

5th instar caterpillars, which are the biggest size before they pupate, eat a LOT of milkweed, as much as one leaf per hour!  Keep your eye on these guys to make sure they do not go hungry.

PUPATION:

Once your big caterpillar is ready to become a beautiful chrysalis he will climb to the top of the container and you will see him forming a little "web" of silk with his mouth.  There will be a little pad of the stuff with threads that reach out up to two inches around it.  This is what the caterpillar will attach it's hind end to and form its cremaster.  A cremaster is a little black stem that the chrysalis itself will hang from.  

Before the caterpillar becomes a chrysalis it will hang upside down in what is called a "J" position.  It stays like this for what seems like forever, and you can watch and watch but it always seems to change when you take a break for 5 minutes!!!  I was lucky enough to actually see it happen, and because I'm an avid photographer I had my camera in hand and took a time lapse video of it:


I used 105 photos to make this time lapse

The process in the video above took about 5 minutes from start to finish.  The skin of the caterpillar is forced upwards and falls off and the chrysalis underneath will eventually harden into a soft shell.  Be careful not to mess with the fresh chrysalis too much.  If it happens to fall before it hardens it will harden in an irregular shape and won't hatch.  

The chrysalis must be hanging upright for the butterfly to form inside!  If  your chrysalis does happen to come off of it's "web" there is something you can do.  Take a drop of white glue and put it on the cremaster (don't use superglue its too toxic) and then tie a thread around it.  Once you are sure that the thread is securely on the cremaster you can then thread it through some screen or tie it to a branch in order to preserve it.  You can even do this on purpose if the container that you chose was going to be too small for the emerging adult.  This chrysalis in the left photo fell after I opened the lid of the container, not realizing that the web was attached on two sides!

This is the same chrysalis with the thread tied to the cremaster.

My next blog will be about hatching as I have currently over 20 chrysalis...