Thursday, September 6, 2012

Relocating Monarch Chrysalis

I recently had a couple of people ask me how I was able to move the Monarch chrysalis from it's original habitat to wherever the heck I wanted to put it so I could photograph it.  Most of my caterpillars were raised in somewhat shallow tupperware and it only took one of them falling and flailing on the bottom to realize that they were not in a good spot.  I read several online articles written by others who had raised them and learned a neat trick.

First, I will say it helps to have two people involved in this process.  If you can have one person hold up the surface that the chrysalis is attached to it will be much easier to tie the thread around the cremaster.

Here is what you will need to do this:

White glue, do NOT use any other kind of glue but non-toxic white!  About 12" thread per chrysalis, and a pair of scissors.

Doing it by myself, I balanced the tupperware top in such a way that it was accessible to me but also was steady and wouldn't fall.


Taking a piece of thread I made a large loop, like I was going to tie a knot without pulling it tight.

I carefully "lassoed" the chrysalis

I pulled the knot closed and then did a double knot to make sure it was tight. 

Once it was tied I turned the lid on its side and placed a very small drop of glue right over the knot, making sure that I got some on the cremaster as well.  Its OK to lay the chrysalis flat for a minute or two.  Just be very gentle not to squeeze it when handling it directly.

Here you see the chrysalis and the white silky patch that firmly connects it to the lid.  This stuff is seriously strong.  You will need to gently scrape the edges with your fingernail to loosen it, but don't yank on the chrysalis until it is starting to peel off easily.  It makes a noise like when you peel a big ol' sheet of skin off a sunburn.

Try to bring as much of the silk with you when you pull it off.  


Take the silky stuff and kind of wad it up around the cremaster and get it in the glue.  This will doubly ensure that it is now firmly attached to the thread.  This baby isn't going anywhere!  The silk is very sticky.

Next, about 3-4 inches up from the top of the chrysalis, make a tight knot in the thread to form the loop that you will hook over whatever it is you want to hang it off.

Trim off the extra thread and you are ready to hang!

Deck the mums with loads of pupa!

Saturday, September 1, 2012

Metamorphosis: Complete

My last post was about finding and raising Monarch caterpillars.  This one will be about what happens once that 10 day waiting period is over.  Magical does not even begin to describe this process.  You can break this process down as scientifically as you want and I will still be in awe and amazed at the complex design of this creature who's only purpose seems to be mystifying everyone who sees it.  That's how I feel about all butterflies and many moths.

Anyway, I will pull my head out of the clouds of wonder for a few moments and describe to you what I saw!

When I woke up on Friday morning and came downstairs to make my Maypo I noticed that the two chrysalis that had formed first were both black!  This happened to me with the first butterfly I hatched this summer (before I stumbled on the huge bounty of caterpillars I've now got) and I waited up into the night waiting for it to hatch.

Taken August 11, 2012 

Of course it waited until I went to sleep to come out!!


There was a little something different about these chrysalis.  They were black as midnight.

Chrysalis #1 Taken August 31, 2012

Chrysalis #2 Taken August 31, 2012

You can see the difference!  Another bit of useful info that one of my Facebook friends gave me is that you will see a bit of liquid inside the chrysalis at the bottom moments before they emerge.  This is meconium, or "frass" (butterfly poop) which is also the term for when a human baby has it's first bowel movement inside the womb!  Monarchs are born head down and the large part at the top of the chrysalis contains it's abdomen, all of which is squished up in like an accordian.  You can see in the photos that the wings are tightly packed to the sides.  Look at how a fresh chrysalis looks like a mold for the butterfly wings:

This chrysalis has not yet compressed and hardened, and you can see the wing detail and even the form of what the abdomen looks like (ringed part at the top)!  The yellow dots will become that beautiful metallic gold that is made possible by a chemical compound found in milkweed poison!  

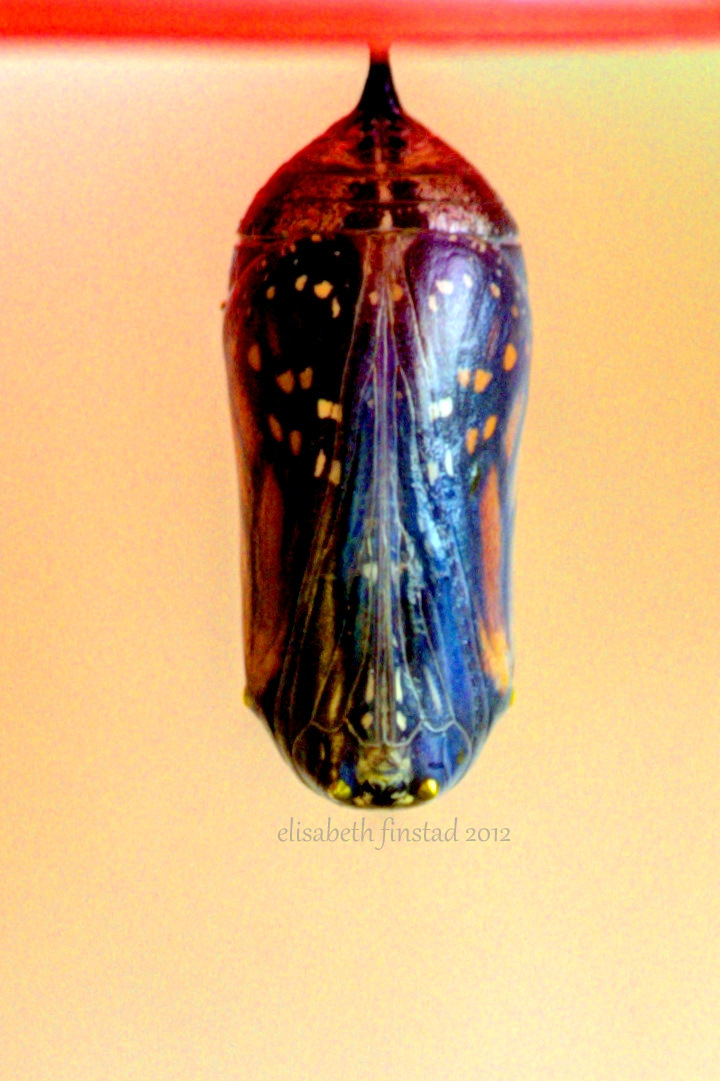
This chrysalis is a few hours older than the above one, and is how it will look until it turns black.  You can still see the wing pattern!  There is an iridescent quality to the entire chrysalis that is hard to photograph, and you may not even notice unless you hold one in the light and look at it.  


Unfortunately one of the chrysalis fell off it's cover because I opened the tupperware it was in and didn't realize it had threaded too close to the side. 


 These need to be hanging properly or they won't form correctly.  I had read that you can take a bit of thread and white glue (no superglue!) and rehang them, so I thought I would give it a try.


The black "stick" at the top is the cremaster.  I put a small dot of white glue on it and then carefully laid it down on the counter and wrapped a piece of white thread around where the glue was and double knotted it:


At first I didn't know what to hang it from so I wrapped the thread around the knob of one of my cupboards!  High traffic area though so I had to figure something out...

I went to the local Hannaford grocery store and bought a $5 chrysanthemum!  I needed something for the butterflies to chill on when they were done drying and it fit inside the Butterfly Pavilion nicely!  I ended up pulling and rehanging 4 chrysalis on this mum just like Christmas ornaments!  I will be doing more tomorrow because the tupperwares they are in are too shallow to effectively allow the butterfly to dry. 

Now, on to the emergence.  As I had been able to do time-lapse movies for both molting and pupating I had hoped to get one of the last stage as well.  I watched that second chrysalis like a hawk.  I set my camera up with the 18-55mm kit lens I love so much and checked on it every few minutes.  

As you can see I have suspended the chrysalis between two drinking glasses in order to allow enough room for it to hang.  When I had come home to find the first butterfly out it was laying on the bottom of the tupperware flailing it's legs because it had not had enough room to expand and fell. 

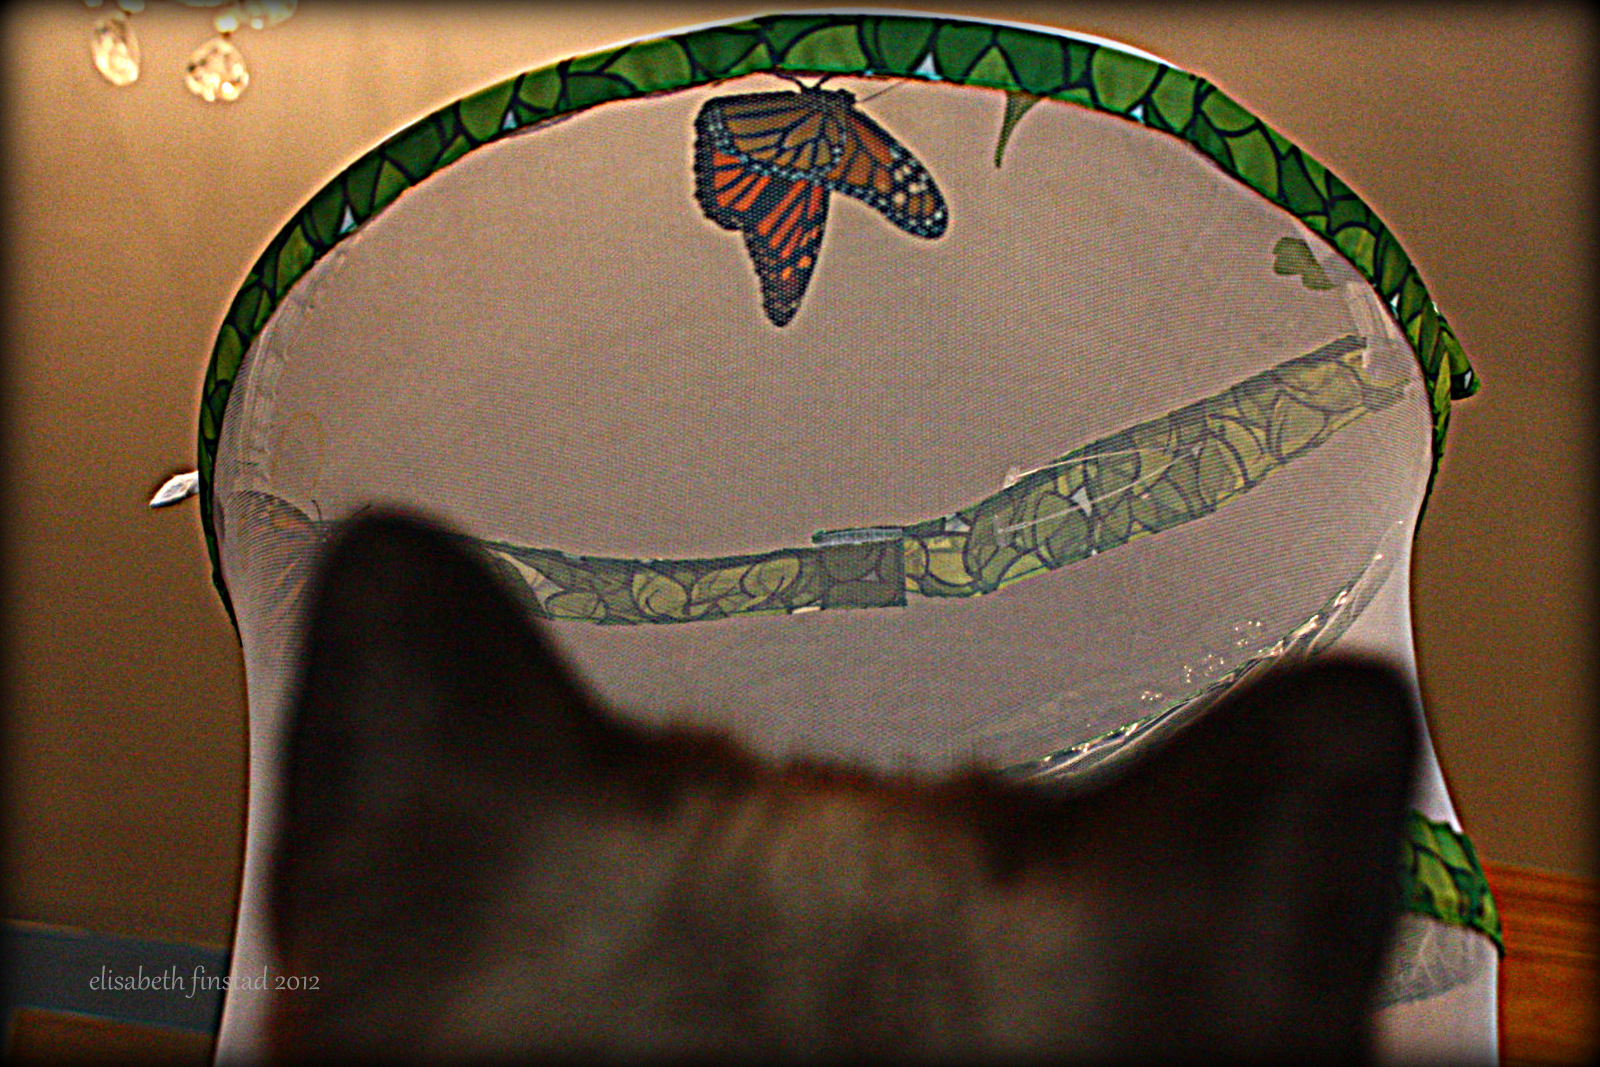
Can you spot the butterfly?  I had to hang it on the geranium until I could find a better spot for it to dry!


Much better!

Here is the 18 seconds of amazement that 136 photos over 20 minutes compressed down to:


I keep watching it over and over!!

A still shot


Our Siamese, Shadow, is very interested in the new fluttering object in our dining room!

Next post:  Black Swallowtail caterpillar/chrysalis attempt!

Thursday, August 30, 2012

Raising Monarch Butterflies Because I Didn't Have Enough To Do Already

If you are thinking about raising a Monarch caterpillar, please read this entire posting as I have tried to include everything that I learned, both good and bad, and some preparatory info that will raise your chances for success.


FINDING MONARCH EGGS AND CATERPILLARS:

This summer I had determined that I was going to find a Monarch caterpillar.  It had been a while since I had spotted one and I wanted to do it right this time.  One of my friends had raised from eggs and released 12 Monarchs which she documented on Facebook, and I decided that if I wanted to do this I needed to really put some effort into it this year.  So I did as much research as I could about what eggs looked like, how to find them, etc.  Last year I brought home leaves that I thought had eggs on them, but they turned out to only be little hardened drops of milkweed milk!  Upon actually looking it up I discovered that eggs are not round, they are kind of football shaped with a point at the top.

Underside of a leaf

Under a microscope

This one was on the top of the leaf

As soon as I realized this was what they looked like I started finding them all over the place!  The butterfly lays 1 egg per leaf, usually on the bottom.

Egg Hunting Tip:  Look on the shorter, fresher milkweed growth for eggs.  The huge plants usually do not have eggs on them.  I think this is because the baby needs tender leaves to munch on when they are first hatched.


Baby caterpillar fresh out of the egg!

Baby caterpillars look much different than the big stripey ones we are used to seeing.  They barely have any "horns" and are very light colored.  Be careful when turning over leaves that you don't squish one by accident or knock one off!

This one is about 3 or 4 days old, and has only molted once.

Facts about the Monarch caterpillar life cycle (most info from http://www.Monarch-Butterfly.com):

  • It takes about 4 days for the eggs to hatch once laid.
  • It takes about 2 weeks for the caterpillar to fully become and adult.
  • It takes about 10 days for the caterpillar to become a butterfly inside the chrysalis.  10 days to become something completely different than it was when it came out of the egg.
  • Adult butterflies of the first three generations born during the summer in the Northeast live 2-6 weeks. The fourth generation is the one that will migrate all the way to Mexico for the winter.
  • The Monarchs that are overwintering in Mexico will live 6-8 months!  They kind of "shut down" as they hang from the trees down there in order to conserve their energy before flying back north.
  • Only 1 in 10 caterpillars will make it from egg to adult in the wild.
  • Caterpillars go through 5 growth stages, or what are called "instars".  Their skin does not grow with them, but they molt, or shed their skin, and then eat it as it contains vital nutrients. 
Time lapse video I made of a caterpillar molting into what I think is the 3rd instar.

4th instar caterpillar eating it's molt


WHAT CAN GO WRONG AND WHAT YOU WILL NEED TO DO ABOUT IT:

One thing you may not think about is what can go wrong when raising caterpillars that you found in the wild.  I know when we were kids if we found a caterpillar we didn't even think twice about diseases, parasites, etc.
I found one caterpillar that had odd brown splotches on it's back.  They were kind of oily looking and I thought the caterpillar was just dirty.  But because he looked a little odd I thankfully kept him separated from the others.  However, I did have him in the same container as some of the milkweed I had collected, and if I could go back I would not have done that.


This caterpillar most likely has/had OE, which stands for Ophryocystis elektroscirrha.   This is a protozoan parasite that spreads by spore.  Microscopic spore.  It causes the caterpillar to become mottled looking and can end up in either a dead caterpillar, a deformed butterfly, or a butterfly that can fly but will be smaller and weaker and will spread the spores as it flies around.  Bad.

Let me explain about another parasite that can afflict these creatures before I tell you what to do if you find this occurring.  There is a parasitic fly called the Tachinid Fly that will lay it's eggs behind the caterpillar's head by injecting them right through the skin.  It then flies off and the caterpillar goes on munching away.  Depending on what stage the caterpillar was at when infected it will either die and the larvae will come out of the caterpillar itself, or it will pupate and the larvae will drill their way out of the chrysalis and rappel their way down on long white threads.  You can easily tell if a chrysalis is infected, but there is almost no way to tell if the caterpillar is unless it dies.  Here is an infected chrysalis that I had:


There are drops of rain on the chrysalis in these photos.  This was the second infected chrysalis I had.  The other had the strings on it but it freaked me out so I threw it away before taking a photo!

Here is what to do if you have either of these problems occur: 

You will need to destroy the insect/chrysalis.  I know this is hard, and I have trouble killing ANYTHING especially something that I love and raised.  I chose the method of putting it into a zip lock back and putting it in the freezer.  I had to wrap the bag in paper towel so I wouldn't have to look at the dead stuff after.  Leave it in the freezer for a night or two and then make sure it is still sealed and throw it in the trash.  DO NOT PUT THEM BACK OUTSIDE!!!  Do not put a diseased caterpillar, chrysalis, or butterfly back out where the parasite can infect others!  Stop the spread before it starts!

Prevention is also the best method to keep this stuff from spreading and to raise healthy adults.  I want to share what I did wrong in the beginning and then what I realized I needed to do and will religiously do next summer.

Here is the wrong way to store a ton of caterpillars that you found all over the place:

Look at that jumbled mess!!  

Here is the correct way to store a ton of caterpillars:


Each caterpillar has his/her own tupperware container with airholes at the top.  I bought the red topped ones at the Dollar General for about .50 each.  Remember to poke the air holes from the underside so that there are no sharp edges if the caterpillar crawls up to the top, which they often do to molt.  Jim Hedbor, a butterfly/moth enthusiast that I have known since I was a kid, suggested that I put a piece of paper towel in the bottom of each container to keep it more sanitary and make it easier to clean.  I bought the paper towels that come in those "choose your size" packs and cut each one in half, which was the perfect size for the containers.  I emptied and cleaned each container three times a day since I am at home for the most part and I'm a little neurotic.  I don't like to let them sit in their own filth for very long.  If you are gone most of the day I suggest putting 5-6 milkweed leaves in the container so that the poop will fall to the ground and they won't be trying to eat around it. 

FINDING AND STORING MILK WEED

You are probably looking at those containers in the above photo and thinking, wow that must be a huge pain in the tuckus to go out and collect that milkweed!  Especially if they have to be fed three times a day!  Yes, yes it is.  A couple of people on Facebook mentioned I can store it in the fridge with a zip lock baggie.  I never thought of that!

I also try to select only nice green leaves with minimal aphid damage.  Also I try to get leaves of all different sizes in order to not waste a big leaf on a baby caterpillar, and vice versa.  If there are just a few aphids on the leaves then it is salvagable, but if you can find leaves that are nice and clean then there is less work to be done.

Ladybug eating aphids on the underside of a milkweed leaf.  Do not collect leaves that look like this!

CATERPILLAR FEEDING TIP:  Try to collect entire small plants for the babies.  If you find milkweeds that are 8 inches or shorter and are in good shape grasp them from the bottom near the dirt and pull straight up.  Have a glass of water ready to put them in immediately because milkweed wilts extremely fast.  

Once I have picked a large amount of good leaves (don't bother with the dried out yellowish-brown leaves) I bring them inside and wash them in cold water just like I would for a salad, and then dry them on paper towels.  Make sure you remove any insects that are on the leaves as some of them may hurt your caterpillars.  Once dried off I put them all inside a large freezer bag and into the fridge they go!  

5th instar caterpillars, which are the biggest size before they pupate, eat a LOT of milkweed, as much as one leaf per hour!  Keep your eye on these guys to make sure they do not go hungry.

PUPATION:

Once your big caterpillar is ready to become a beautiful chrysalis he will climb to the top of the container and you will see him forming a little "web" of silk with his mouth.  There will be a little pad of the stuff with threads that reach out up to two inches around it.  This is what the caterpillar will attach it's hind end to and form its cremaster.  A cremaster is a little black stem that the chrysalis itself will hang from.  

Before the caterpillar becomes a chrysalis it will hang upside down in what is called a "J" position.  It stays like this for what seems like forever, and you can watch and watch but it always seems to change when you take a break for 5 minutes!!!  I was lucky enough to actually see it happen, and because I'm an avid photographer I had my camera in hand and took a time lapse video of it:


I used 105 photos to make this time lapse

The process in the video above took about 5 minutes from start to finish.  The skin of the caterpillar is forced upwards and falls off and the chrysalis underneath will eventually harden into a soft shell.  Be careful not to mess with the fresh chrysalis too much.  If it happens to fall before it hardens it will harden in an irregular shape and won't hatch.  

The chrysalis must be hanging upright for the butterfly to form inside!  If  your chrysalis does happen to come off of it's "web" there is something you can do.  Take a drop of white glue and put it on the cremaster (don't use superglue its too toxic) and then tie a thread around it.  Once you are sure that the thread is securely on the cremaster you can then thread it through some screen or tie it to a branch in order to preserve it.  You can even do this on purpose if the container that you chose was going to be too small for the emerging adult.  This chrysalis in the left photo fell after I opened the lid of the container, not realizing that the web was attached on two sides!

This is the same chrysalis with the thread tied to the cremaster.

My next blog will be about hatching as I have currently over 20 chrysalis...


Thursday, August 9, 2012

Burn It Down


Today started out pretty good.  I woke up with enough time to shower (ok so Autumn's door was stuck shut from the humidity so she couldn't get out...) and actually ate breakfast before I had to leave to pick up a child that I was transporting from S. Burlington to Milton, plus I had a coffee and it was kind of nice out!  Upon my return home I got the dishes done, the floor swept, the living room cleaned up, all sorts of stuff.  Then Autumn said, with those big blue eyes, "Mommy I want pah-corn" and I was in such a good mood I said "Ok honey, if I can find some I will make you some."

What it looks like when properly cooked

Well, I found 2 bags of the kind that come in the bags that have the red cellophane on them so that you can use the bag as a bowl.  I have cooked them a couple of times before with no problem, usually taking 2 min and 15 seconds or a little more.

So trying to think ahead I set it for 3 minutes and figured I'd just stop it when it was done.  I started it and when it had just started to pop at about 45 seconds in my phone rang.  It was Alicia calling me from New York where she was camping with her Dad and brother.  Then as I was trying to understand what she was saying, Autumn started asking me questions about something.  I tried to ignore her but she is very persistent. So I'm talking on the phone to one kid and trying to figure out what the other kid is doing, and meanwhile the time on the popcorn has reached 2 min and 45 seconds.  I smell something funny.  Oh crap I burned the popcorn, wasn't the first time and wouldn't be the last.

Except that there was something a little different about this time.  I was somewhat far away from the microwave when I realized that it was burning so it took me a few crucial seconds to get to the Off button.  Thick yellow smoke was pouring out of the edges of the microwave.  I opened the door stupidly and a billow of smoke hit me in the face with one of the nastiest smells I have smelled with my smeller.  Burning plastic and burning corn kernels.  Barf.  I immediately threw the door shut and stared at the smoke curling up towards the ceiling.  Crap.  It was heading straight for the smoke detector!!!  Well that sucker didn't even go off with smoke tickling it's sensors.  Great.  That's comforting.  I had Autumn go upstairs (wrong way, should have put her outside or the basement I know) and threw the cats into the basement and shut the door.  Then I opened every door and window and turned on all the fans I could.  My throat started to burn and my eyes started to water.  Suddenly I understood how people could easily be overcome by smoke, thinking there was no fire in the immediate area so they were safe, but sadly wrong.  Scared the crap out of me.

Luckily I was smart enough to have shut that microwave door because I cut off the oxygen and the smoke eventually dissipated, however leaving a horrible raunchy smell.  Not enough Febreze in the world.  The inside of the microwave is now a permanent shade of piss yellow and everytime I open it I get hit in the face with that awful smelly smell.  My house still has the odor of it as well.  I think I need to scrub the entire kitchen floor to ceiling to get the freaking burning movie butter stench residue off!

Can you see the drip stains from the burning butter? LOL

Meanwhile, upstairs, I went to check on Autumn.  She had shut her door to her bedroom and was hiding in the closet!  I came in and she said, "Mommy I scared of fire!"  (Note:  there were no actual flames that I could see, but I think that a few seconds more and there would have been)  Poor kid.  She came back downstairs and I put PBS Kids on for her while I scrubbed the inside of the microwave out.

"Mommy, where my pah-corn??" I hear her sweet little midget voice say.

I looked at the last bag of popcorn sitting on the counter.  Dare I try?  Ah, what the heck.  I threw it in and watched it that time and it came out fine.  But it still stinks in there.

Wednesday, July 11, 2012

Summer Vacation Diary: Crappy Art Edition

One thing that my daughters both really enjoy doing is creating a huge mess.  Luckily there is this thing called "Arts and Crafts" that allow you to make said mess but add glue!  When my 2 year old found a big box full of those shiny metallic plastic die cut thingamajiggies I figured "Hey, I'm a grown up now, I took art classes in college, maybe I can actually do something interesting with those!"
This is the result:

It is what one of my worst critics in college would call "Hippie Crap".  That sentiment echoes in my head every time I try do to anything artsy.  That a-hole really ruined my artistic self esteem.

Did putting the fake museum frame around it in Picasa make it look any better?  Didn't think so LOL  And I know you are dying to know what I made those fantastic clouds out of!  The answer is:  those round stickers you write prices on for your yard sale items!  Genius!  And yes its both day and night in my picture.  Hey its art, and you can't be wrong in art.

My other interest is painting.  I used to be pretty good at it.  Again, my best paintings were done in college around midnight when I was...inspired.  Watercolor is one of those things that can look amazing when done properly, and also the most washable paint ever.  This means I have tons of it.  I unfortunately have paper that calls itself "Watercolor Paper" but LIES!!!  Yesterday I tried to make a good painting, but was rushed.


Could be much much better.  I blame it on the bad paper.

Today I am considering breaking out the acrylics.  That is, if they aren't all dried up from sitting in storage for upwards of 3 years.  I found some canvases in the basement.  It looks like a good day to make some more Hippie Crap.
  

Monday, July 2, 2012

Summer Vacation Diary Day 11

Today:


  • I got my lazy butt up at 5:15 again and took a walk.  So nice out.
  • All three kids were home and within moments of them being downstairs the bickering started.  I decided to just ignore it.
  • My ex called at 11:00 and said he had the week off so he was going to take them this afternoon for overnight at least one night.  This is bittersweet.  I am glad they get to go somewhere and do stuff, like go swimming and bike riding, but I do miss them when they are gone and I feel like I've barely seen Alicia for a week.  Yes I complain about the bickering but it is better than them not being here.  And Autumn is starting to break down when they are not here because she misses them!  Its heart breaking.
  • I did 6 loads of laundry.
  • No shower.
  • Trying to keep images from the movie I saw Saturday night out of my head.  Can't get the song "Pony" by Ginuwine to stop playing over and over in my mind.  Or "Blow My Whistle" by Flo Rida.  This is not the type of music I normally ever hear!!!  Yikes!
  • I tried to take the kids to the free lunch program that the state is doing this summer for kids under 18.  We were so out of food it was scary.  Everytime I have gone somewhere that there is food I have been overeating because I'm used to there being next to nothing.  Then I feel sick that night and the next day.  How did this happen???  Oh yeah!  There are THREE kids eating me out of house and home all day long!  
  • Foodstamps have been renewed for the month.  Yes I am on foodstamps.  And very grateful for them. Its virtually impossible to support a family of five on what my husband is currently making.  I finally got brave and grocery shopped this afternoon when Kris got home.  I hate going on the first because, well, I'm sure you can figure it out.  They have usually restocked by Monday so there was lots of food.  I haven't shopped like that in months.  I can't believe how much more food costs.  What I bought used to come to about $159 but this time it was $198!  I always buy the same stuff!  Crap.
  • I ended the day by taking another walk.  I need new sneakers so badly.  My feet were so sore after just a forty minute walk.  Not in the budget right now, need to find some good sales. 

Sunday, July 1, 2012

Summer Vacation Weekend Edition Vol 2


Saturday was birthday party day.  I brought Alex to one at 1:00 and sadly he was the only kid that showed up.  I think summer birthday can really stink if you are relying on inviting kids from your class that you aren't friends with outside of school.  Alex RSVP'd himself, went to the Dollar General, set himself a limit on how much he was going to spend, and actually stuck with it!  So hard for me to let him make his own decisions but I am keeping my mouth shut.  I want him to be the opposite of me!!  I get anxiety calling people I don't know, and I always spend too much on gifts because I don't want to let someone down if they expected something great, etc.  

After the party the older kids went with their Aunt to go roller skating.  Both kids have them now and I was a total carpet wall clinger when I used to try to skate at Skateland back in the 80's and early 90's so thank GOD there are other adults around to get them into this fun sport.  I have a wonky foot so it makes it near impossible to do anything that involves balancing with my feet.  

Saturday night I went to a movie.  This is not a movie I normally would have chosen to see but I was going with a group of girls and really wasn't sure what I was in for.  We saw Magic Mike.  Holy crap.  That is all.

Sunday we went to my parents' house and my mom had the most genius Idea.  Her Idea was to make a list of crap you can find outside around their house and give a copy to each kid and tell them its a photo scavenger hunt.  That means they each have to take their cameras and get a semi-clear photo of each item.  It kept them busy for a solid 40 minutes!  

This coming week is the 4th of July week.  At least there is plenty to do for several of the days.